I chose to shoot pictures and then convert them to color pop. When editing for color pop that first thing you have to do is create a duplicate layer and then desaturate your image. Once you do that you can erase the desaturated image and let the color pop through. The hard thing about using color pop is making sure that you aren't being really boring and unoriginal. Many people have popped colors on dresses or flowers or eyes. I chose to use the photo of the candle because I thought it was different. I thought that the flame looked cool because the color pop gave it glowing, hazy effect.
ISO: 400
Aperture: 2.8
Shutter Speed: 1/250
Layne's Photo Album
Monday, June 6, 2011
Friday, June 3, 2011
Visual Puns
A visual pun is an image or images used to show words. For example, hotdog could be shown by a picture of a dog in a fir. iPod could be eyeballs in a pea pod. These are examples of visual puns. This assignment was meant for us to create a funny image by applying all of the editing techniques we have learned so far in class.
(Deviled egg)
(Dr. Pepper)
(I see dead people)
(Deviled egg)
(Dr. Pepper)
(I see dead people)
Tuesday, May 31, 2011
Visual Dictionary
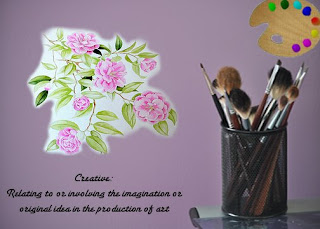
Our task was to find five words from the Dictionary (that were school appropriate), then use our knowledge of Gimp editing techniques in order to create pictures that explained the meanings of these words. My five words are: infancy, abduction, creative, omnipotent, unicorn.
5 Senses
I took photos of objects that represented the five human senses: sight, smell, taste, touch, and hearing. The sense I thought I got the best shot of was touch. This is shown by a picture of my mom running her fingers through my dogs fur. I liked this picture because of the way the light is hitting her hand and how you can see reach hair brushing against her fingertips. When capturing any of the fie senses you want your viewer to be able to feel as if they were experiencing what is going on in the scene. For example, you want people to be able to smell the burning candle or the freshly cut grass. You want them to feel the soft pillow or hear the music playing in their head.
ISO: 200
Aperture: 4
Shutter Speed: 1/250

ISO: 200
Aperture: 4
Shutter Speed: 1/250
Monday, May 23, 2011
Panoramic Assignment
As an open assignment I decided to shoot panoramic images. Taking panoramic images involves shooting a series of pictures--usually 3-4 pictures--then stitching them together in order to form a single wide-angle image. I took three pictures this week: my backyard, farm fields, and a Sunday school classroom. I chose to capture my backyard because we have a lot of long berms and a wide pond. A panoramic image allows we to capture all these objects in one picture. Also, the farm fields were easy to take a panoramic of because they were long and went on for miles, and since everything was the same it was easy to edit the pictures together. Lastly, I shot the classroom because I wanted a panoramic where you could see the walls coming at you.
ISO: 400
Aperture: 4
Shutter Speed: 1/1600

ISO: 400
Aperture: 4
Shutter Speed: 1/1600
Friday, May 20, 2011
Portrait Assignment
While taking portraits we used two different lighting techniques. One technique was called 3-point lighting. In this setup there are three lights: key light, fill light, and hair light . The key light is the main light source and is placed inside of soft-box. Fill lights help to eliminate the shadows caused by the key light. Lastly, the hair light helps get rid of the light that is cast behind your head. The other lighting set-up, window light, utilizes natural light and is a cheap alternative. All you need for window light portraits is a window with light coming through a camera with manual settings, and a bounce card (an object with a reflective surface). The light from the window serves as a key light and the bounce card is like a fill light.
Monday, May 16, 2011
Nature/Landscape Assignment
This week I chose to photograph nature. Unfortunately, when I went outside to take my pictures it was raining. This is one of the difficulties in shooting nature, you cant control the weather. Also, lighting can be hard to manage if it is cloudy. In order to compensate for the lack of light I had to use a larger aperture and slow shutter speed. The slow shutter speed sometimes resulted in motion blurs from the plants moving in the wind, but for the most part it allowed to needed amount of light into the picture.
ISO: 800
Shutter Speed: 1/1600
Aperture: 6.3

ISO: 800
Shutter Speed: 1/1600
Aperture: 6.3
Subscribe to:
Posts (Atom)


